
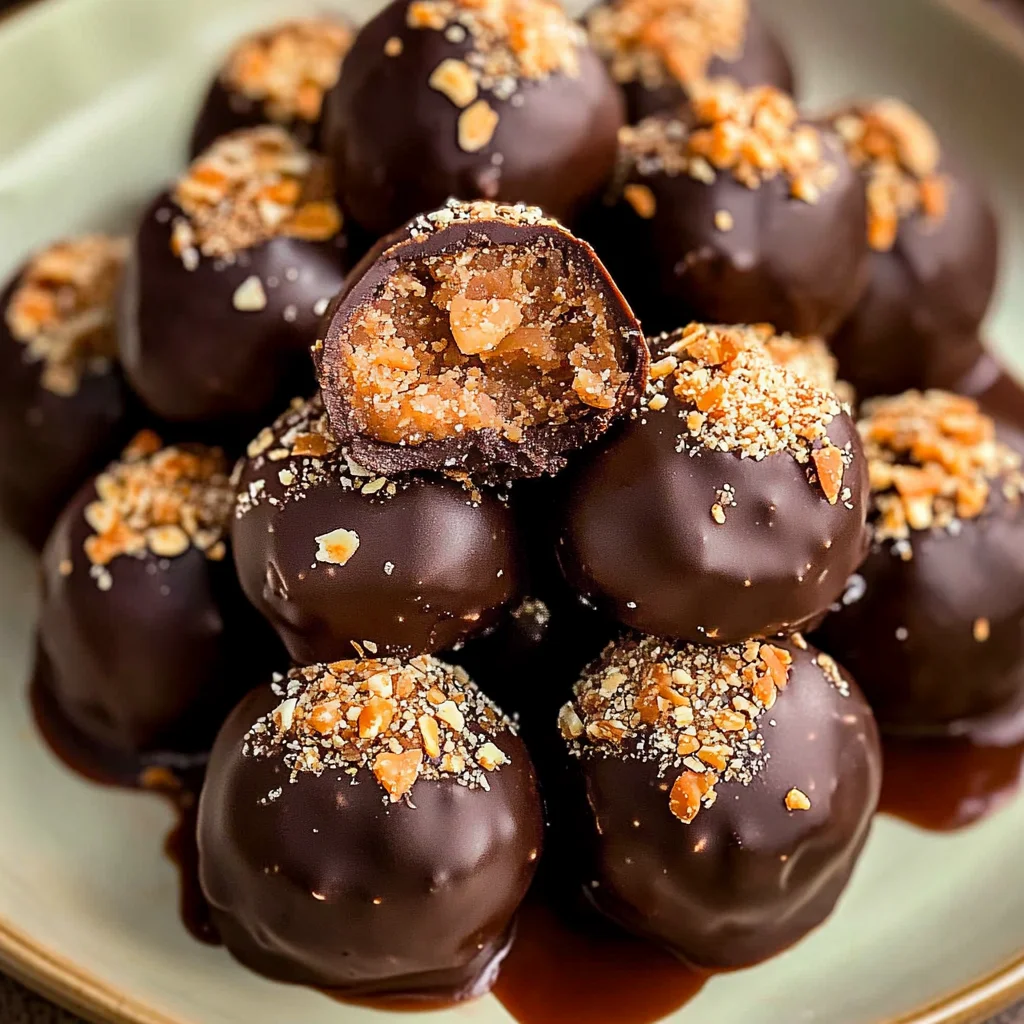
Butterfinger Balls: The Ultimate No-Bake Treat
Craving something sweet but don’t want to heat up the oven? These Butterfinger Balls are your new go-to indulgence! Made with crushed candy bars, creamy peanut butter, and a luscious chocolate coating, they’re a breeze to whip up and require zero baking—perfect for satisfying those sugar cravings in no time. Ready to treat yourself? Let’s make this tonight!
What Makes This Butterfinger Balls Special?
Quick and Easy: Whip these up in minutes with no baking required!
Crowd Favorite: Everyone loves the irresistible combo of chocolate and peanut butter.
Budget-Friendly: Made with simple ingredients that won’t break the bank.
Texture Heaven: Enjoy a delightful crunch from Butterfinger and smooth peanut butter.
Versatile Treats: Swap out Butterfinger for your favorite candy bars for endless fun!
Meal Prep Friendly: Make a batch ahead of time for quick snacks or desserts.
Diet-Friendly Options: Easily adapt to gluten-free needs by using certified ingredients.
Ingredients for the Butterfinger Balls
Each ingredient in this dish plays an essential role in flavor and texture. Here’s what you’ll need:
- 4 bars Butterfinger candy bars (crushed): Provides a sweet, crunchy element that defines the treat.
- 1 cup creamy peanut butter: Adds richness and binds the mixture together for a smooth texture.
- 1 cup powdered sugar: Sweetens the mixture while giving it a delightful, melt-in-your-mouth quality.
- 1 cup chocolate chips (semi-sweet or milk chocolate): Creates a luscious coating that complements the flavors perfectly.
- 1 teaspoon coconut oil (optional, for smoothness): Ensures the chocolate coating is glossy and easy to work with.
How To Make Butterfinger Balls
Make these irresistible treats in just a few simple steps — sweet satisfaction is just minutes away!
1. Mix the ingredients: In a mixing bowl, combine 4 crushed Butterfinger candy bars, 1 cup of creamy peanut butter, and 1 cup of powdered sugar. Mix until everything is well combined and you have a thick, sticky mixture that smells like pure bliss.
2. Form the balls: Using your hands, form the mixture into small balls, about 1 inch in diameter. Place each ball on a baking sheet lined with parchment paper, feeling the texture change from sticky to smooth as you roll them.
3. Melt the chocolate: In a microwave-safe bowl, melt 1 cup of chocolate chips and 1 teaspoon of coconut oil together in 30-second intervals. Stir in between until smooth and glossy; the rich aroma will fill your kitchen!
4. Coat the balls: Dip each Butterfinger ball into the melted chocolate, ensuring they are fully coated. Return them to the baking sheet, allowing the luscious chocolate to envelop every bite.
5. Chill and serve: Refrigerate the coated balls for about 30 minutes or until the chocolate is set. Serve chilled or at room temperature for an extra treat!
Pro Tips
- Crush evenly: Ensure your Butterfinger bars are crushed into similar-sized pieces for consistent flavor and texture throughout.
- Texture boost: If your mixture feels too sticky while forming balls, slightly dampen your hands to make rolling easier without adding extra powder.
- Chocolate choice: Use semi-sweet chocolate chips for a more balanced flavor; milk chocolate will give you that classic sweetness everyone loves.
- Smooth finish: Adding coconut oil not only helps melt the chocolate smoothly but also gives it a shiny finish — perfect for presentation!
- Taste enhancement: For an extra flavor kick, sprinkle a pinch of sea salt on top of the chocolate coating before it sets; it enhances all those sweet notes beautifully!
Storage Tips & Reheating Guide

These no-bake treats are perfect for making ahead of time and storing for later enjoyment.
- Fridge: Store in an airtight container for up to 1 week. Keep layers separated with parchment paper to prevent sticking.
- Freezer: Freeze for up to 3 months in a freezer-safe container. The chocolate coating may become slightly softer upon thawing, but the flavor remains intact.
- Reheat on the stove: Not recommended as these treats are best enjoyed cold or at room temperature; reheating can alter texture.
- Microwave: If you prefer them slightly warm, microwave individually for about 10-15 seconds on low power. Be sure to check and stir gently if necessary for even warmth.
- Avoid sogginess: Do not store them in direct contact with moisture or humidity, as this can lead to a soggy texture.
Customize This Butterfinger Balls
Make this Butterfinger Balls your own with these easy swaps for different diets and cravings.
- For a vegan version, swap out the Butterfinger bars for crushed vegan candy bars and use natural peanut butter without added sugar.
- Keep it gluten-free by choosing gluten-free candy bars or making your own no-bake mixture using gluten-free graham cracker crumbs instead of Butterfingers.
- To make it dairy-free, opt for dairy-free chocolate chips in the chocolate coating.
- For a low-carb or keto variation, use sugar-free candy bars and substitute powdered sugar with a low-carb sweetener like erythritol or stevia.
- If you want to spice things up, add a pinch of cayenne pepper or cinnamon to the peanut butter mixture for a surprising kick!
- For added texture, mix in some chopped nuts or seeds into the Butterfinger mixture before forming into balls.
- Instead of rolling into balls, press the mixture into a lined baking dish for easy slicing into bars, perfect for sharing!
- Skip the chocolate coating altogether and roll the balls in crushed nuts or unsweetened cocoa powder for a different finish.
- Want extra creaminess? Stir in some coconut cream with the peanut butter for a tropical twist!
FAQ
Can I make this recipe gluten-free?
No, Butterfinger candy bars contain gluten. If you need a gluten-free option, try using a gluten-free candy bar that has a similar texture and flavor.
How do I prevent the chocolate from seizing when melting?
To keep the chocolate smooth, make sure to use a microwave-safe bowl and melt it in 30-second intervals, stirring in between. Adding coconut oil can also help achieve a silky texture.
What can I substitute for peanut butter?
If you’re looking for an alternative, you can use almond butter or sunbutter. Just keep in mind that it will change the flavor slightly.
Can I make these treats ahead of time?
Absolutely! You can prepare them a day or two in advance and store them in the fridge until you’re ready to serve.
How long do these last in the fridge?
They’ll keep well for about one week in the refrigerator if stored properly in an airtight container.
What should I serve with these no-bake treats?
These treats are delicious on their own, but they pair well with a scoop of vanilla ice cream or a drizzle of caramel sauce for an extra indulgent dessert.
Butterfinger Balls
Ingredients
Method
- In a mixing bowl, combine the crushed Butterfinger bars, peanut butter, and powdered sugar. Mix until well combined.
- Using your hands, form the mixture into small balls, about 1 inch in diameter, and place them on a baking sheet lined with parchment paper.
- In a microwave-safe bowl, melt the chocolate chips and coconut oil together in 30-second intervals, stirring in between until smooth.
- Dip each Butterfinger ball into the melted chocolate, ensuring they are fully coated, and return them to the baking sheet.
- Refrigerate the coated balls for about 30 minutes, or until the chocolate is set. Serve chilled or at room temperature.